Kohler Single-Lever Tub Faucet Repair
 After 13 years in my house my tub faucet finally started leaking. Not bad, actually. The tub is in a separate section from the shower and is not used daily so perhaps that explains its leak-free service for more than a decade.
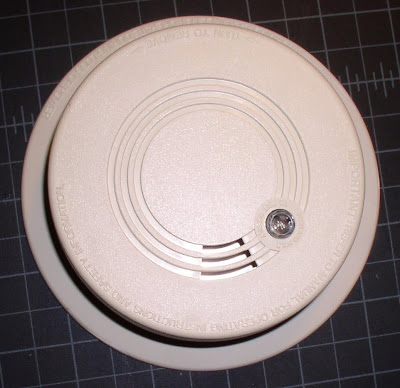
 Here's a picture of what the faucet looked like before I replaced it, pictured next to its replacement part, which I found at Lowe's. ["Universal Tub Filler Spout - Chrome" by BrassCraft® Mixet® brand (SWD0447 D, Genuine Mixet Repair Part - Part #50 PK).] Cost was $11.75 + tax.
I thought perhaps this was the only source of the leak. However I still had a leak after replacing this part:
 I realized I needed to replace the cartridge. Pictured on the right is the original cartridge next to its replacement part:
 After searching at both Lowe's and Home Depot, I finally located the Kohler replacement cartridge at my local Ace Hardware: The Lasco Coralais Single-Lever model number is: S-331-3. The cost was $25 plus tax.
The package for the replacement cartridge offered additional help at the following website: www.lasco.net. Here are the step-by-step directions that I located for replacing the faulty cartridge:
Faucet Stem Removal
Step 1: Turn off water to house or under the sink you are working on.
Step 2: Using a screwdriver pry up and remove the button from the top of the handle.
Step 3: Remove the screw from the top of the handle.
Step 4: Pull the handle off. (Use 13-2701 Handle puller if necessary)
Shower and wide spread faucets require the removal of the flange at this point of the repair
Step 5: A Using a pair of pliers (use masking tape to protect the finish) unscrew the flange from the faucet stem body this should expose the stem assembly.
Step 6: Using an adjustable wrench or deep socket unscrew the stem bonnet from the faucet body, Or remove the cap nut from the top of the faucet body.
Step 7: Remove the stem or cartridge from the faucet body.
Cartridge Stem Repair
Step 8: Using a pair of pliers pull up to remove the cartridge assembly. (Plastic cartridges should be replaced rather than repaired)
Step 9: Pull cartridge apart by pushing down on the top of the stem.
Step 10: Using a screwdriver pull the o-rings off the stem and bonnet assemblies.
Step 11: Replace all o-rings.
Step 12: Using a pair of pliers remove the seal and spring from the faucet body.
Step 13: replace the spring then the seal. (Apply a small amount of silicon grease)
Step 14: Reinstall the cartridge.
Step 15: Tighten the cap nut over the cartridge.
Reinstall the stem or cartridge into the faucet body. Repeat process for the other stem.
Step 16: Turn on water and check for leaks.
Step 17: Replace handles and screw into stem.
Step 18: Push handle button onto handle.
 The view of the area where I removed the faulty cartridge:
 Here's the new cartridge ready to be installed:
 Installing the cartridge is easy... just make sure the main water valve is turned off.
 Be sure to use plumbing tape to make a tight seal before screwing on the next part:


 Approximate total repair cost: $37 + tax

Comments
Maintenance Renewal likes nothing more than a happy customer. This company has quality and customer service as a top priority. We are independently owned and operated so everything is done by me and to the highest quality. We have been involved in the trade for over a decade now and use only the best products and techniques available. It is very important to the company, that the customer is satisfied. We believe that is the only way a business can succeed. Call today for a free estimate.
Faucet Repair in Virginia
Above The Stove Microwave Installation in Virginia
Storm Door Repair in Virginia
Awesome and great post! Thank you for sharing this.I really the
way you write this Blog. Looking forward to read more blogs from you.
Plumbing Services Edmonton
Plumbing & Heating Services Edmonton