Ceiling Fan Installation 101
Being the DIY gal that I am, when a friend offered a barely-used ceiling fan, how could I resist attempting to install it myself? This has turned out to be a bigger challenge than I had anticipated.
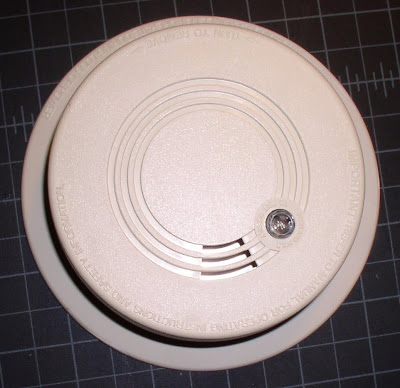
The Existing Light Fixture
For starters, here is the basic light fixture I had before removing it for this new install. It came with the house and is in a spare bedroom I use for a home-office.

The Existing Brace
This is what the existing "brace" looked like in my attic above this ceiling. It did not look sturdy enough to bear the weight of an approximately 25-30 lb. fan and light fixture. Notice this hole cut out for the fixture is not centered between the joists, rather it is centered in the room.


 Once the previous light fixture and the metal box for electrical connection was removed -- NOTE: BE SURE TO TURN OFF ELECTRICITY AT BREAKER BOX BEFORE WORKING ON THIS -- I was left with a cut-out hole in my ceiling. Next step was to remove the existing brace and replace it with this much sturdier brace I purchased from Home Depot: Model #01525 Saf-T-Bar from Westinghouse
Oops! Removing the old brace can be hazardous to your ceiling!
That proved to be a bit more challenging. I had not realized giant staple-like pieces of hardware were hammered into the joists. I used a screwdriver as a chisel and a hammer to pry the old brace from the joists. The first one came out nicely. When I attempted the second one, I still did not realize there were those giant staples because the lighting was not good up in the attic. I accidentally chiseled a bit too far and punctured the ceiling. This is what it looked like.

 I was able to repair the puncture hole by applying joint compound (or spackle) from the ceiling side, due to the nature of this puncture. Then I returned to the room and dabbed additional on the ceiling side of the hole. I was able to burnish up the drywall so it was virtually invisible. I think it turned out pretty good! A little touch-up paint and I doubt anyone would notice.

The New Brace: Saf-T-Bar
Next I positioned the new Westinghouse Saf-T-Bar brace in place up in the attic and trimmed a small bit of drywall from the ceiling to allow this metal octagon electrical box to peek through the existing round hole.

 I ended up using a simple screwdriver to attach the brace plates to the joists. I found the screwdriver gave me better control. I tried using a cordless drill, which I had borrowed from a friend, but found it to be too clunky to maneuver under the stapled wiring that criss-crossed through the attic. I was only able to get four screws in the plates... would have preferred four per plate for a total of eight screws. I ran into knots in the wood and just awkward positioning of the electrical box to the joist.
Attaching this brace was the worst part of the entire job because it was very hot in the attic and there was no lighting since I had turned the power off. I had placed a large board over the joists so I had a place to kneel while working there. Obviously you have to be very careful where you are standing, etc. so as not to fall through the ceiling. There was lots of insulation which is not good for inhaling or for the skin. I wore a mask some of the time, but got very hot with that on so at times did not wear it.

 Notice below the red circled areas are the nuts that need to be tightened to firmly attach the electrical box to the brace up in the attic. The green circled areas indicate the "10-24 Threads for Ceiling Fans and Chandeliers." If I was hanging just a simple light fixture like what I removed, I would use the tabs on the opposite corners of this box (not circled here).

NOTE: BE SURE TO TURN OFF ELECTRICITY AT BREAKER BOX BEFORE THIS TASK: I punched the tabbed nickel-shaped disc from the metal outlet box so the wires could be threaded through to the room via the top of the box. I found using a screwdriver as a chisel and a hammer to pop that tab out worked best.


The Mounting Bracket
Here is the Mounting Bracket that came with the fan to support the weight of the fan when installing. It gets attached to the ceiling outlet box, which should be 4" x 2-1/4" deep metal octagon box (required per the fan instructions). Do not use plastic electrical boxes, per instructions. According to the Westinghouse Saf-T-Bar, use the "10-24 Threads for Ceiling Fans and Chandeliers." Those are found on the opposite corners of the "8-32 Threads for Cover Plates and Lightweight Lighting Fixtures."
 Shown below is the mounting bracket attached to the metal electrical box on the ceiling. There is a ground wire on the mounting bracket. There is a ground (copper) wire that comes from the attic and a third ground wire that comes from the fan. I have grouped these three together and fastened with a wire nut. Then white wire attaches to white wire. Black wire attaches to black wire and fastened with a wire nut.

The Ceiling Fan
Here is the ceiling fan, with fan blades removed, that I am installing. It was made for JCPenney and offered through their catalog (No. 852-0231) as per the manufacturer instructions packed with it.


The Wiring and The Remote Receiver

Update 11/29/09: I moved this fan to another room and had to rewire. I am noting the connections that I made here:


The Finished Product
And here it is! Looking forward to enjoying it for years to come!

The Existing Light Fixture
For starters, here is the basic light fixture I had before removing it for this new install. It came with the house and is in a spare bedroom I use for a home-office.

The Existing Brace
This is what the existing "brace" looked like in my attic above this ceiling. It did not look sturdy enough to bear the weight of an approximately 25-30 lb. fan and light fixture. Notice this hole cut out for the fixture is not centered between the joists, rather it is centered in the room.


 Once the previous light fixture and the metal box for electrical connection was removed -- NOTE: BE SURE TO TURN OFF ELECTRICITY AT BREAKER BOX BEFORE WORKING ON THIS -- I was left with a cut-out hole in my ceiling. Next step was to remove the existing brace and replace it with this much sturdier brace I purchased from Home Depot: Model #01525 Saf-T-Bar from Westinghouse
Oops! Removing the old brace can be hazardous to your ceiling!
That proved to be a bit more challenging. I had not realized giant staple-like pieces of hardware were hammered into the joists. I used a screwdriver as a chisel and a hammer to pry the old brace from the joists. The first one came out nicely. When I attempted the second one, I still did not realize there were those giant staples because the lighting was not good up in the attic. I accidentally chiseled a bit too far and punctured the ceiling. This is what it looked like.

 I was able to repair the puncture hole by applying joint compound (or spackle) from the ceiling side, due to the nature of this puncture. Then I returned to the room and dabbed additional on the ceiling side of the hole. I was able to burnish up the drywall so it was virtually invisible. I think it turned out pretty good! A little touch-up paint and I doubt anyone would notice.
The New Brace: Saf-T-Bar
Next I positioned the new Westinghouse Saf-T-Bar brace in place up in the attic and trimmed a small bit of drywall from the ceiling to allow this metal octagon electrical box to peek through the existing round hole.

 I ended up using a simple screwdriver to attach the brace plates to the joists. I found the screwdriver gave me better control. I tried using a cordless drill, which I had borrowed from a friend, but found it to be too clunky to maneuver under the stapled wiring that criss-crossed through the attic. I was only able to get four screws in the plates... would have preferred four per plate for a total of eight screws. I ran into knots in the wood and just awkward positioning of the electrical box to the joist.
Attaching this brace was the worst part of the entire job because it was very hot in the attic and there was no lighting since I had turned the power off. I had placed a large board over the joists so I had a place to kneel while working there. Obviously you have to be very careful where you are standing, etc. so as not to fall through the ceiling. There was lots of insulation which is not good for inhaling or for the skin. I wore a mask some of the time, but got very hot with that on so at times did not wear it.

 Notice below the red circled areas are the nuts that need to be tightened to firmly attach the electrical box to the brace up in the attic. The green circled areas indicate the "10-24 Threads for Ceiling Fans and Chandeliers." If I was hanging just a simple light fixture like what I removed, I would use the tabs on the opposite corners of this box (not circled here).
NOTE: BE SURE TO TURN OFF ELECTRICITY AT BREAKER BOX BEFORE THIS TASK: I punched the tabbed nickel-shaped disc from the metal outlet box so the wires could be threaded through to the room via the top of the box. I found using a screwdriver as a chisel and a hammer to pop that tab out worked best.


The Mounting Bracket
Here is the Mounting Bracket that came with the fan to support the weight of the fan when installing. It gets attached to the ceiling outlet box, which should be 4" x 2-1/4" deep metal octagon box (required per the fan instructions). Do not use plastic electrical boxes, per instructions. According to the Westinghouse Saf-T-Bar, use the "10-24 Threads for Ceiling Fans and Chandeliers." Those are found on the opposite corners of the "8-32 Threads for Cover Plates and Lightweight Lighting Fixtures."
 Shown below is the mounting bracket attached to the metal electrical box on the ceiling. There is a ground wire on the mounting bracket. There is a ground (copper) wire that comes from the attic and a third ground wire that comes from the fan. I have grouped these three together and fastened with a wire nut. Then white wire attaches to white wire. Black wire attaches to black wire and fastened with a wire nut.
The Ceiling Fan
Here is the ceiling fan, with fan blades removed, that I am installing. It was made for JCPenney and offered through their catalog (No. 852-0231) as per the manufacturer instructions packed with it.


The Wiring and The Remote Receiver

Update 11/29/09: I moved this fan to another room and had to rewire. I am noting the connections that I made here:
From junction box:
white to white
black to black
red also to black
copper grounding wire to green grounding attached to mounting bracket
white to white
black to black
red also to black
copper grounding wire to green grounding attached to mounting bracket
Then from the remote to the wiring also from the fan:
blue to blue
white to white
black to black
Secure all tightly with wire nuts and test by tugging firmly to ensure they won't come loose.
blue to blue
white to white
black to black
Secure all tightly with wire nuts and test by tugging firmly to ensure they won't come loose.
* Note if you have any concerns, its best to consult a professional electrician.
I am definitely not an electrician!
Once the remote was attached, there were quite a few wires and it proved challenging to slide the remote up into the mounting bracket. There was a lot of trial and error a) getting it all to fit behind the cosmetic canopy piece and b) getting it to work with the remote.I am definitely not an electrician!


The Finished Product
And here it is! Looking forward to enjoying it for years to come!


Comments
There's a fire risk if you don't protect the wire where it enters the electrical box. You are supposed to use a cable clamp on the hole you opened to feed the cable into the box.
Just saying'